Following our series of trainings, we come to our prospects sync session. This one has three sections: Import Contacts/Leads, Configure Salesforce for Pardot and Configure Fields and Mapping.
Import Contacts/Leads
The first thing we need to do after we have Account Engagement installed, every user has the correct permissions and the connector is set, is to “prime” the system.
To prime the system, we need to import the first batch of leads and contacts from Salesforce’s production org into Pardot. It’s important to ask the client which records they need to import.
- In Salesforce, go to Reports and create a new Report
- Select Leads type
- Add any standard field you want to bring into Pardot. The required fields should be First Name, Last Name, CRM Id and Email
- Export the report as CSV
- Go to Account Engagement Settings and on the left area, click on import

- Upload your CSV file
- Since we have the CRM Id on our CSV, we can select the option: Create and update prospects using Salesforce Lead or Contact ID.
- In the next section, you can map the fields you need. Some of these are automatically mapped for you
- Everything in Account Engagement needs a campaign, so select a campaign for this first import
- For the first import, we just want to create prospects, so you can select that option
- Confirm and Save
Do the same for your contacts, and you have primed your system! You can go to the prospects tab and see your first prospects in there.
Configure Salesforce for Account Engagement
You might want your salesforce users to have some basic Account Engagement information under each Lead or Contact record.
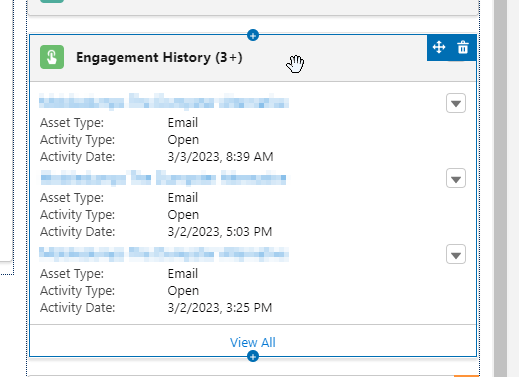
When you install Account Engagement, you also get some useful tools on the Salesforce side, some items such as the ability to view Pardot Activities for each Lead, or their Lead Grading and Scoring:


To set this up, you can follow these steps:
- Go to Setup / Object Manager
- Select the object you want to add this information into – Leads/Contacts
- Go to Page Layouts
- Add any Pardot Component you want by dragging the component to the page layout
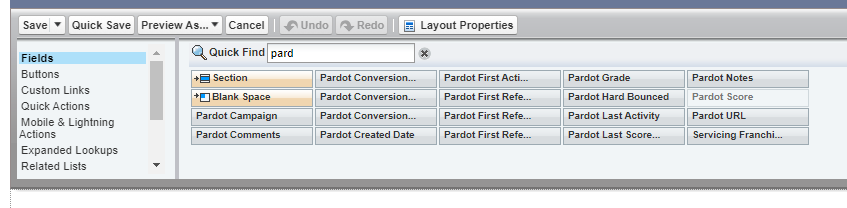
- To add Account Engagement Activities, go to your Object’s Lightning Page – Lead/Contact – Edit Page

- Drag the Engagement History Component anywhere on the page
Keep in mind that any user in salesforce still needs the Pardot permission set added so they can see all this information.
Configure Fields and Mapping
Back to the Account Engagement settings page, we can create any new custom fields. When you install Account Engagement, every standard field from salesforce is automatically added to each prospect. However, if you have the need to bring over any custom field, you need to create it in Account Engagement and map it
- Go to Account Engagement Settings
- On the left navigation, expend Object and Field Configuration and select Prospect fields

- Click on Add Custom field and fill out the name of your custom field
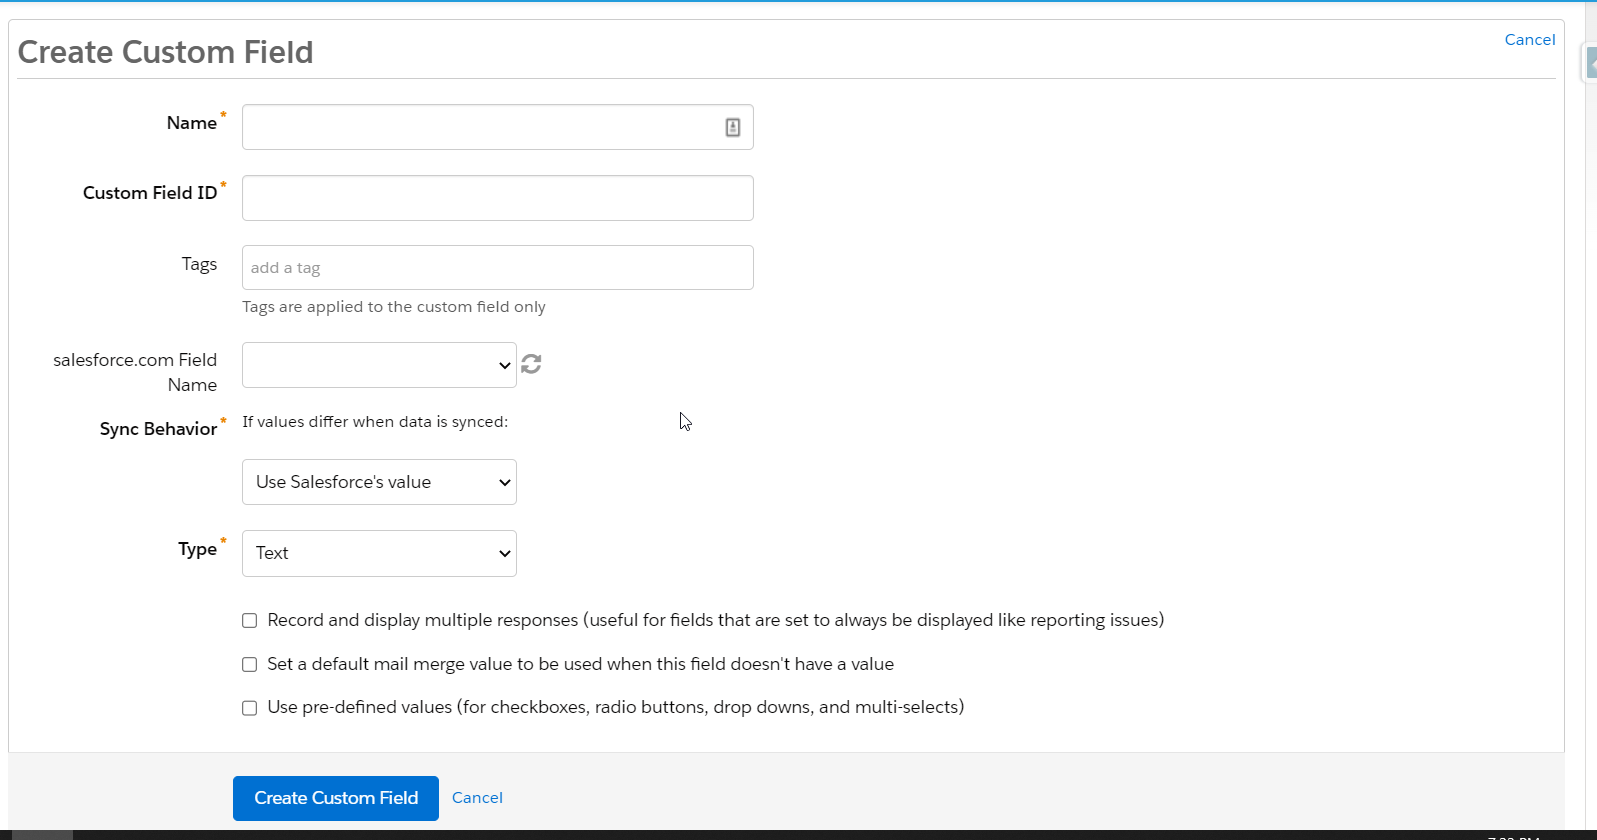
- In the salesforce.com Field Name, you can select the custom field from salesforce that you want to map
- Sync Behavior refers to what way you want your custom field’s data to sync. It can be to just use salesforce’s value, only Pardot’s Value or the most recently updated value.
- Select the type of your field and click on Create
- Once you click on create, Account Engagement will ask if you wan to sync all your prospects or not.
That’s it! In this session, you have imported your first prospects, created any necessary custom fields and added useful Pardot fields on Salesforce records.
